
So you want to wrap your fleet or a single company vehicle? Here's the real timeline: a professional vehicle wrap installation typically takes 3 to 5 days total from start to finish, with the actual installation itself running anywhere from 1 to 9 hours depending on your vehicle's size and how much coverage you want.
This isn't just "slap vinyl on a truck and call it done." There's real strategy, precision design, meticulous prep work, and careful application involved. If you're planning a wrap project for your business, you need to understand what's actually happening during each phase so you can plan accordingly and set realistic expectations with your team.
The Complete Vehicle Wrap Installation Process and Timeline Breakdown
Let's walk through this step by step. The vehicle wrap installation process follows a clear sequence, and understanding each phase helps you plan your project without surprises.
Related: Sign Installation Permits & Regulations: A Complete Guide
Related: Vehicle Wrap Maintenance & Care: Complete Guide
Related: Vehicle Wrap Durability and Longevity: What to Expect
Phase 1: Planning and Strategy (Day 1)
Before any design work starts, you and your wrap provider need to sit down and figure out the strategy. This is where you define what you want the wrap to accomplish.
Are you wrapping a box truck for maximum visibility? A sleek sedan for brand consistency? A fleet of service vans? The vehicle type, dimensions, and your budget all influence the design approach. This phase also includes deciding on coverage: full wrap, partial wrap, or just door/side panels.
Your wrap provider should also inspect the vehicle condition during this phase. Rust, dents, or damage underneath affect the final result. Being honest about your vehicle's condition upfront saves headaches later.
Phase 2: Design and Approval (Days 2-3, sometimes longer)
This is where creativity meets strategy. Your designer creates mockups of how the wrap will look on your specific vehicle using your logo, colors, and messaging.
Design quality matters enormously. Poor design creates poor results, no matter how skilled the installers are. You'll want to review for color accuracy, brand alignment, and readability from a distance. If your wrap includes critical information like a phone number or website, make sure it's legible and positioned well.
Approval can happen fast if you're decisive, or it can stretch out if you need stakeholder sign-offs or design revisions. This is usually where timeline delays happen. Build in buffer time here.
Phase 3: Vehicle Preparation (Day 3-4)
This step is invisible to most people but absolutely critical. Before vinyl touches your vehicle, the surface must be perfectly clean and prepped.
Your installer will wash the entire vehicle thoroughly, removing dirt, grime, and contaminants. They'll use specialized cleaning agents and often pressure wash problem areas. Some vehicles need clay bar treatment to remove embedded particles.
Temperature matters here too. Vinyl adheres best in moderate conditions, usually between 60 and 85 degrees Fahrenheit. If weather is extreme, installation gets postponed.
The vehicle also gets inspected for any repairs needed. Small dents or damage might be addressed before wrapping. Trimming and removing hardware like mirrors or trim pieces may happen at this stage.
Phase 4: Installation (4-9+ hours depending on vehicle)
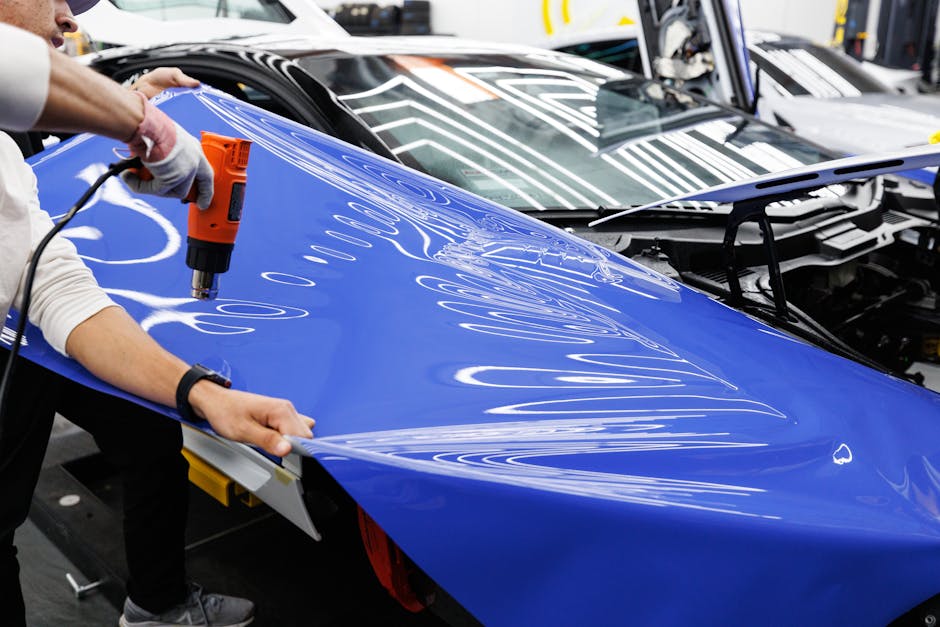
This is where the magic happens. A skilled installer carefully applies vinyl sections to your vehicle, using heat guns, squeegees, and precision cutting techniques.
The timeline here depends on complexity. A simple single-color partial wrap on a sedan might take 3-4 hours. A complex full wrap on a box truck with multiple colors, graphics, and detailed elements can take 8-9 hours or longer.
Installation usually happens in a controlled environment like a shop or garage. Wind, dust, and debris create problems, so professionals work indoors or in protected areas.
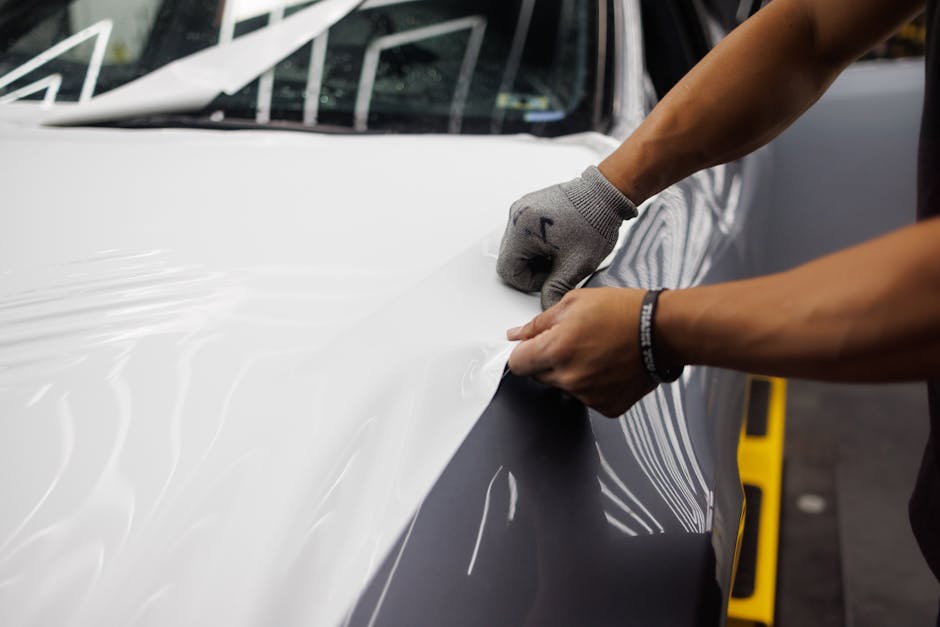
The installer works in sections, applying vinyl, smoothing out air bubbles, and precisely cutting around windows, mirrors, and trim. This requires serious skill and attention to detail.
Phase 5: Quality Assurance and Final Touches (Same day or next day)
After installation, the wrap gets a thorough inspection. The installer checks for alignment, color accuracy, air bubbles, and any lifting or adhesion issues. Trim pieces get reinstalled. Small imperfections get corrected.
The vehicle gets a final wash and detailed inspection. Everything should be perfect before you drive it out.
Why Timeline Matters for Your Business
A 3 to 5 day timeline sounds straightforward, but real projects often run longer. Here's why: stakeholder approvals, design revisions, weather delays, and vehicle condition issues all add days.
Plan accordingly. If you need your wrapped fleet operational by a specific date, order early and communicate deadlines clearly. If you're wrapping a primary company vehicle, plan for downtime.
Also understand that rushing the process leads to poor results. Skipping prep work, rushing design approvals, or trying to install in bad conditions creates wraps that don't last or look bad. Wholesale Signs & Printing prioritizes doing this right, which means respecting the timeline even if it takes a few extra days.
Wholesale Signs & Printing
Get a Free Quote →Related: Custom Signs for Dental Offices: Design & Installation Guide
Related: Custom Interior Wayfinding Signs: Design & Installation Guide
Material Choices and Finish Options
One decision that affects both timeline and final appearance is your finish choice. Vehicle wraps come in several finishes: gloss, matte, satin, and chrome.
Related: Vehicle Wraps Long Beach CA: Design & Installation Guide
Related: Vehicle Wraps Fullerton CA: Design, Print & Installation Guide
Related: Vehicle Wrap Design Best Practices: A Professional Guide
Gloss finishes are traditional, high-shine, and vibrant. They're often the fastest to install because they're easier to work with. Matte finishes look modern and sophisticated but require slightly more care during installation. Satin finishes split the difference. Chrome finishes are eye-catching but the most challenging to install perfectly.
Your finish choice shouldn't dramatically extend timeline, but it's worth discussing with your installer upfront.
Preparing Your Vehicle for Wrap Installation
Before installation day, here's what you should do:
- Schedule around your business needs. Plan downtime if the vehicle is in regular use.
- Remove personal items from inside the vehicle.
- Inform your insurance company. Some policies have coverage considerations for wrapped vehicles.
- Clear your calendar. Don't schedule client meetings or deliveries during the installation window.
- Have photos taken of the vehicle before wrapping, especially if there are existing marks or damage you want to document.
Small prep on your end accelerates the process and prevents miscommunication.
After Installation: Care and Longevity
Installation is just the beginning. A quality wrap lasts 3 to 7 years depending on climate, vehicle use, and care.
Avoid high-pressure car washes immediately after installation, give the vinyl 24 hours to fully cure, and hand wash when possible. Park in shade when you can. These simple habits extend wrap life significantly.
One huge advantage of wraps is that they're reversible. If you rebrand, need to return a leased vehicle, or want a change, the wrap can be removed without damaging the factory paint underneath. That's a major selling point for businesses planning long-term.
Working With a Professional Wrap Provider
Not all wrap providers are equal. This is a specialized service that requires specific equipment, trained installers, and quality materials.
When you're evaluating providers, ask about their process, timeline expectations, material warranty, and removal policies. Look at past work and testimonials. Cheap wraps often come from rushed processes and cut corners that show up quickly.
A quality provider like Wholesale Signs & Printing will walk you through every phase, set clear timelines, and deliver professional results that represent your brand well. They handle everything from initial strategy through final installation, making the whole process straightforward for you.
Common Reasons Timelines Get Extended
Understanding what delays projects helps you avoid them:
- Design approval delays: Multiple stakeholders mean multiple rounds of feedback. Streamline decision-making.
- Vehicle condition issues: Rust, dents, or paint damage require prep work or repairs. Be transparent about vehicle condition upfront.
- Weather: Cold, rain, or extreme heat delays installation. Plan for seasonal considerations.
- Material availability: Custom colors or specialty vinyl might need ordering time. Order early for tight deadlines.
- Unforeseen prep needs: Once the vehicle is stripped down, additional repairs might be discovered. Budget a contingency buffer.
Most delays are preventable with clear communication and realistic planning upfront.
Frequently Asked Questions
How long does it take to install a vehicle wrap?
Actual installation time ranges from 1 to 9 hours depending on vehicle size and wrap complexity. A small partial wrap on a car might take 2-3 hours. A full wrap on a large truck can take 8-9 hours or more. The total project timeline, including design and prep, is typically 3 to 5 days.
Can I drive my vehicle immediately after wrap installation?
Most installers recommend waiting 24 hours before driving to allow the vinyl to fully cure and adhere. After that, normal driving is fine, but avoid high-pressure car washes for at least a week.
How long do vehicle wraps last?
High-quality wraps typically last 3 to 7 years depending on climate, UV exposure, and vehicle use. Commercial vehicles in constant use might see shorter lifespan. Proper care and storage extend longevity significantly. Wholesale Signs & Printing uses premium materials designed for durability and color retention.
Can wraps be removed without damaging paint?
Yes, one major advantage of vinyl wraps is that they're completely reversible. Professional removal leaves factory paint untouched. This makes wraps ideal for leased vehicles, temporary branding, or if you want to change your design down the road.
Wholesale Signs & Printing
Get a Free Quote →